Preparation of Picture Canvas
This is a traditional method of preparing canvas supports for oil painting, using animal skin size (collagen glue) and oil ground. Herein briefly is the process of preparing a painting canvas:
Sizing the Canvas
Take a well-stretched raw linen canvas that has already been rubbed with flat pumice-stone (see the notes in Canvas), lay it flat on a table, and with a wide thin flat brush apply (see the notes in Brush) the glue solution to the canvas by brushing it on lightly, covering the entire canvas as evenly as possible. Most canvases are far too heavily sized. Ideally, the glue should go just half way through the canvas, but this is difficult to achieve in practice. A certain amount always soaks all the way through. Load the brush each time with as little glue as possible. Do not scrub the canvas with a brush heavily loaded with glue. It becomes too brittle when dry and is liable to cause the ground to crack.
Set the canvas to dry, never in direct sunlight or by a stove, for at least 24 hours, better two or three days, then rub it lightly again with the pumice-stone but only enough to soften the surface a trifle and raise a little nap. It is then ready for the ground.
Preparing Collagen Glue Solution
Formula
7 parts Rabbit Skin Glue
100 parts Water
Weigh the dry Rabbit Skin Glue and soak it for a few hours in 100 parts by weight of cold water. Heat the glue and water mixture gently in a double boiler, taking care that it does not boil. Too much heat destroys the strength of collagen glues, so do not allow the heat to exceed 70° C (160° F).
The gel strength of collagen glue varies, so that the above formula of seven parts by weight of glue to 100 parts by weight of water, is not rigid. To test the appropriate glue strength, allow it to cool for several hours, perhaps overnight. If the glue solution barely forms a gel (the consistency of soft jelly), it is the correct strength. If it remains a liquid, there is too much water. If it sets to a stiff gel there is too much glue. More water must be added.
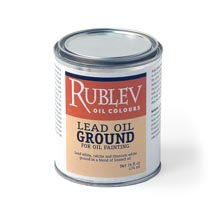
Applying the Ground to Canvas
Lay the canvas flat and, with the same type of brush as that used for the sizing, apply a thin coat of the ground. Take care not to load the brush with too much liquid ground. As in the sizing, the ground should go only half way through the canvas and not soak all the way through. Do not apply it thickly or scrub it onto the canvas.
As soon as the canvas is evenly covered, take a scraper (see notes in Scraper) and lightly scrape it, making long steady strokes with it first lengthways, each stroke the full length of the canvas, and then sideways, at right angles to the first scraping, each stroke the full width of the canvas. This should be enough scraping, but if there seem to be spots where there is still too much ground, scrape it again lengthways and again sideways. If there is a tiny spot or two where the canvas shows through the ground, this can be touched up with a drop of ground on the finger, but do so quickly for the ground sets very soon into a state where it is liable to pull off or roughen if touched or rubbed.
Allow the first coat to dry before applying the second. Allow this ground to dry at least 10 days, better two or three weeks, before using.
When dry, test it for flexibility by pressing with the finger from behind the canvas. The ground should not crack under reasonable pressure.
If you want a heavier ground, wait until each layer as dried before applying additional coats of the ground with the brush, and scrape as before.
Notes
The best canvas of all for painting is unbleached hand-made linen. The more nearly your canvas approaches the qualities of this material, the better. The next best material is hemp, or a combination of hemp and linen. Cotton canvases should be avoided.
A good canvas should stretch as little as possible; i.e., it should not “give” when pulled strongly lengthways or sideways.
The canvas should not be too tightly woven, so that the ground cannot penetrate into it far enough to ensure its holding permanently to the canvas. The grain should be open, but not too open.
If there is any starch or other coating material on the canvas, thoroughly wash it out before stretching.
All canvas, once stretched, should be rubbed with a piece of fine-grained flat pumice stone. Rub with a circular motion, lightly and evenly all over the canvas, until it feels smooth and velvety to the palm of the hand. This raises a fine nap or fuzz that greatly improves the surface of canvas, and makes the glue solution and the ground adhere better. All lumps and knots should be rubbed down with the pumice as much as possible, but be careful not to rub through any of the threads, which may later start a “run.”
Stretching Canvas
In stretching a canvas, care should be taken to avoid any diagonal strains. The pull should be straight along the direction of the threads, both lengthways and sideways. When stretched, run your hand over the surface. If the canvas feels soft in spots, these parts should be carefully re-stretched until the tension is perfectly even all over.
Stretchers
The typical stretchers sold in most art stores are too flimsy and weak. A strong canvas well stretched on such stretchers soon pulls and warps them out of shape. This is not good, as paint tends to become brittle with time so that re-stretching the canvas may cause it to crack and flake off the canvas. Keyed stretchers are convenient but unnecessary. Good canvas properly stretched on strong stretchers should always keep its tension.
Tacks
Typical iron tacks soon begin to rust; and if your pictures are exposed to the least dampness, the rust under the heads of the tacks eats away or rots the canvas until it easily pulls over the tacks and the whole canvas must be re-stretched. For this reason, copper tacks are best.
Brush
A wide thin brush, such as used by for house paint to apply thin paint to walls, is good for applying the glue solution and the grounds. It should be four to six inches wide and about a quarter of an inch thick with bristles about two inches long. Whether the hairs of the brush are natural hog bristle or nylon depends on what is available, but we have found a natural hog bristle brush to be best, because the natural bristles have split ends (called flagged bristles) that hold the liquid ground better and give you better control of the brush strokes.
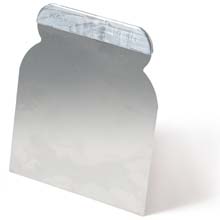
Scraper
Use a putty or broad knife, 4 to 6 inches wide, to scrape the canvas after each coat of ground. You can find these in any hardware store. We have the found best results from using a so-called “Japan Scraper.”